

Portainer is a Universal Container Management System for Docker/Swarm services, Kubernetes and Nomad. It allows us to manage containers, images, networks and volumes from easy-to-use Portainer dashboard and provide much more features.
In this step-by-step tutorial, we will learn how to use Portainer on Docker Desktop. We will also learn how to deploy app containers, quickly and easily; and manage containers, images, networks and volumes using Portainer GUI.
Prerequisite
- Docker Desktop 4.8.0+
What we will do
- Install Portainer extension on Docker Desktop
- Deploy and publish an app container service
- Manage Docker environment using Portainer
1. Install Portainer Extension
Portainer can be installed as an extension to Docker Desktop or as a container on docker environment.
In this tutorial we will install Portainer extension on Docker Desktop and its fairly easy to do so.
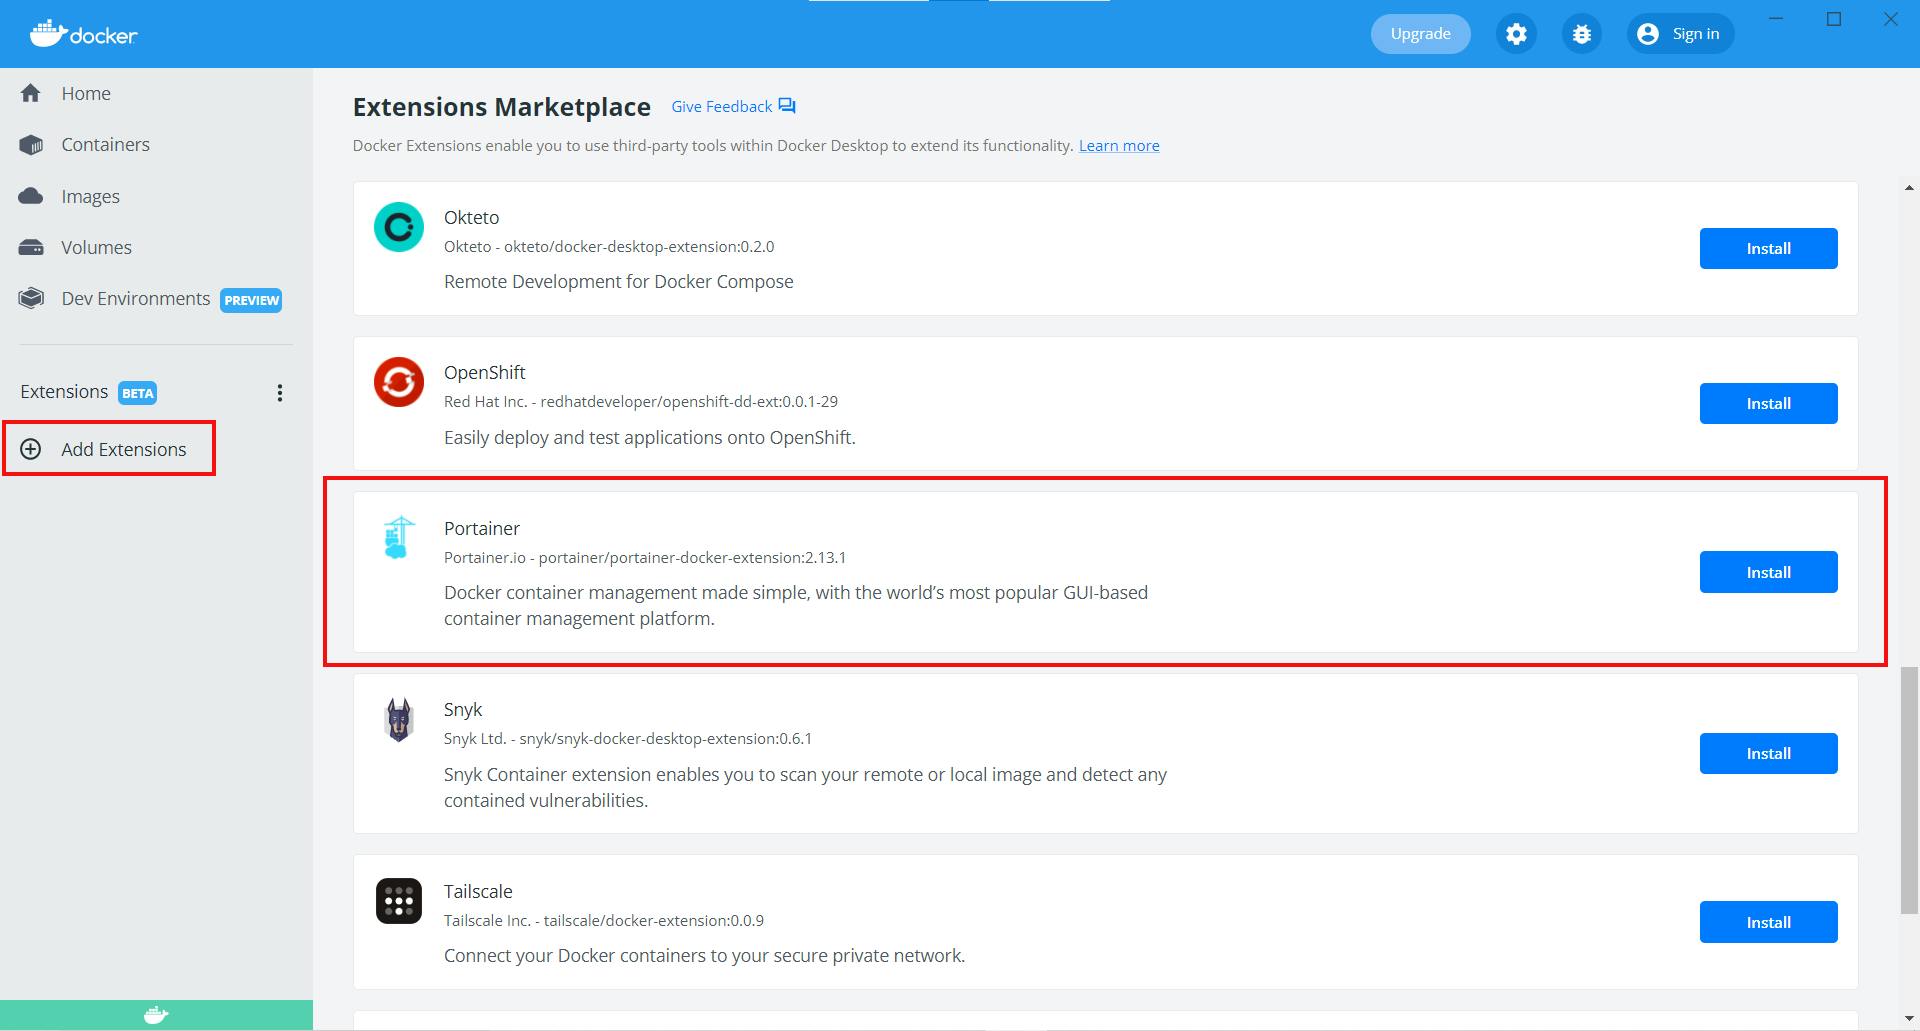
Run Docker Desktop. Click on "Add Extension". Scroll down the "Extension Marketplace" to locate Portainer and click install.
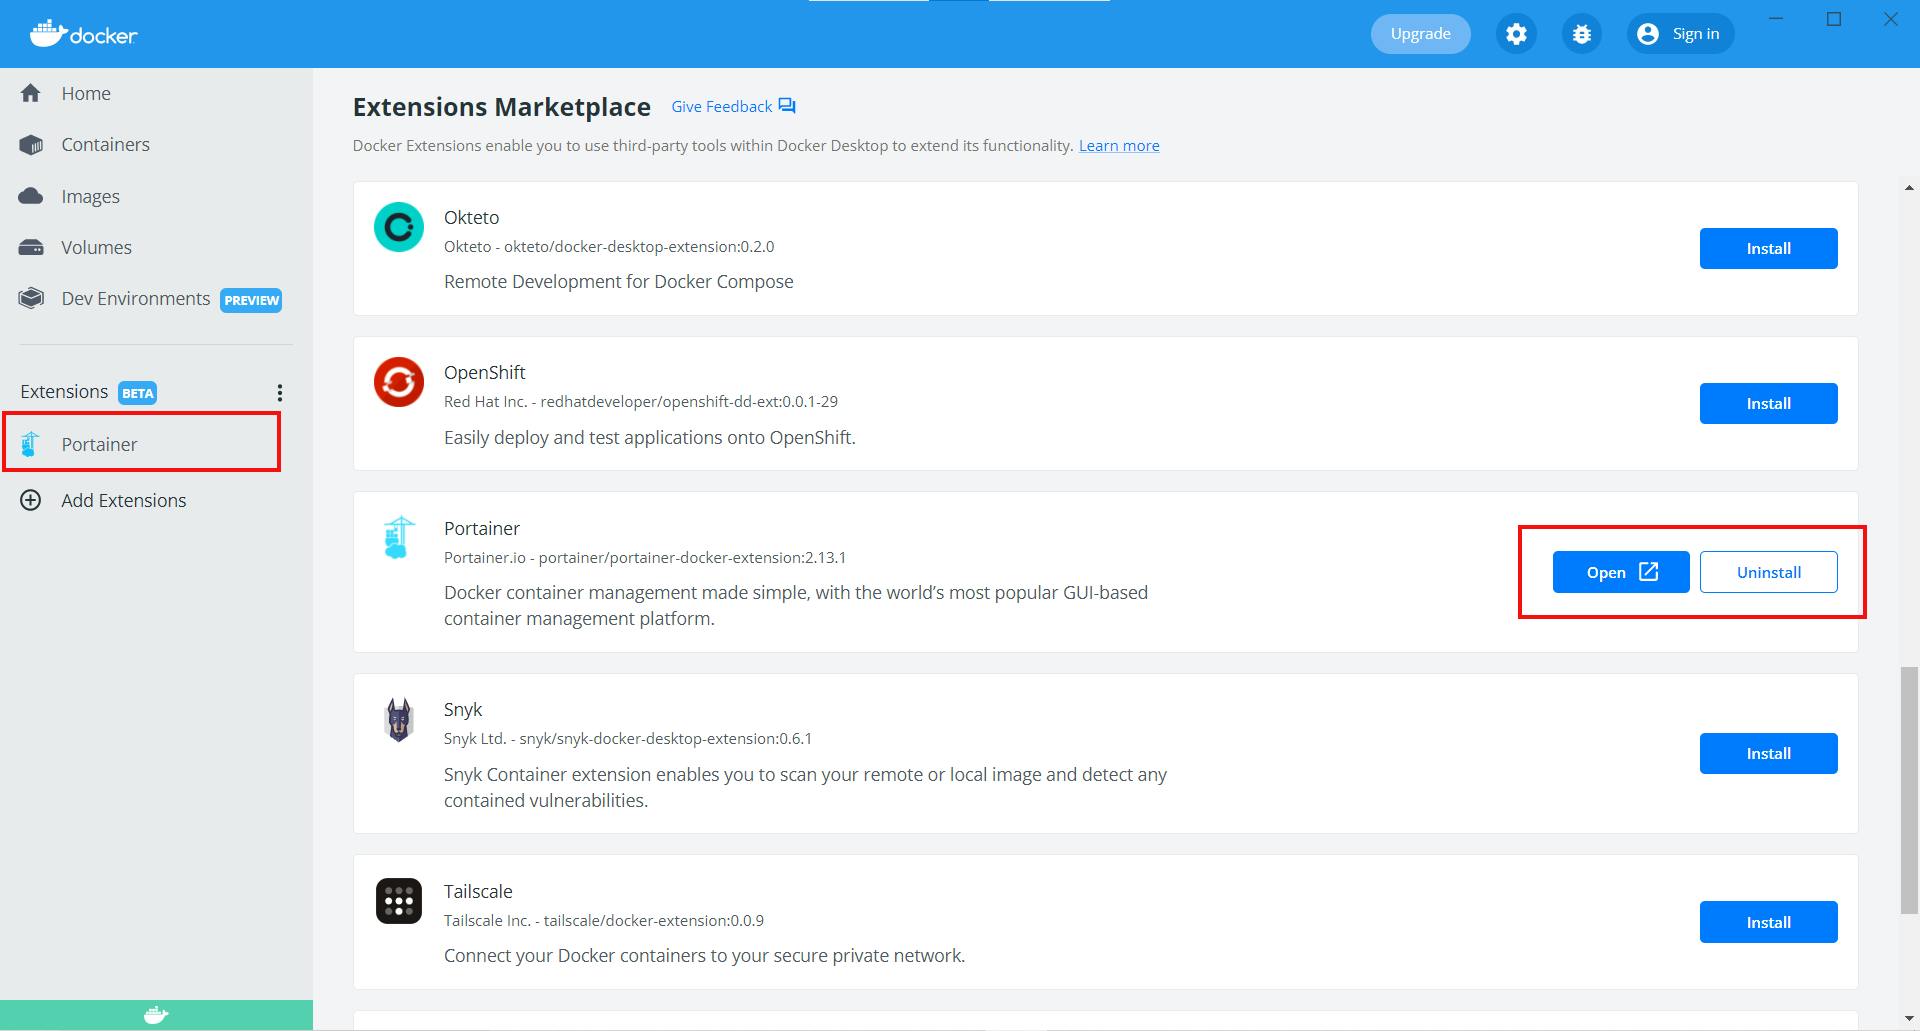
After installation we can see Portainer under extension tab in Docker Desktop. Click on it to access Portainer GUI.
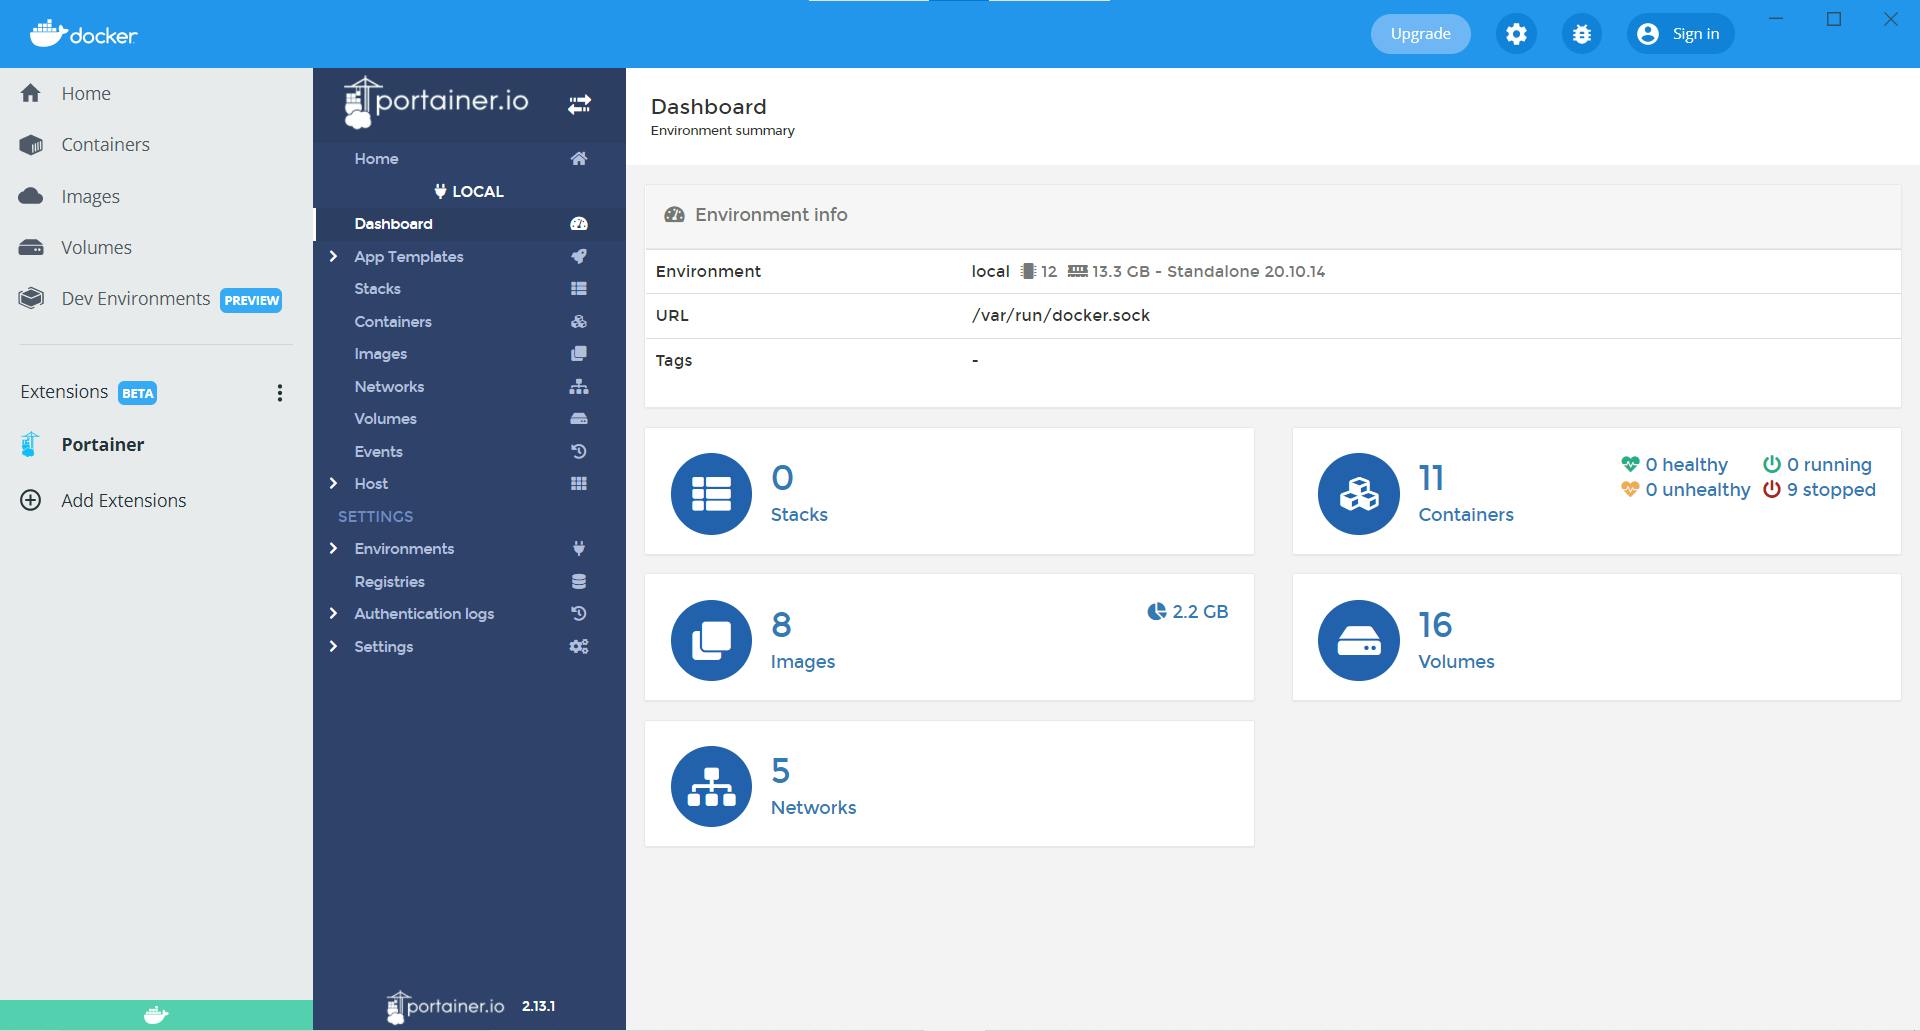
In the image below, we can see that Portainer is installed and connected to our local Docker environment. The 'Home' tab lists all the available Docker environment, displaying brief information about each. Certainly, we can have multiple Docker environment with different properties.
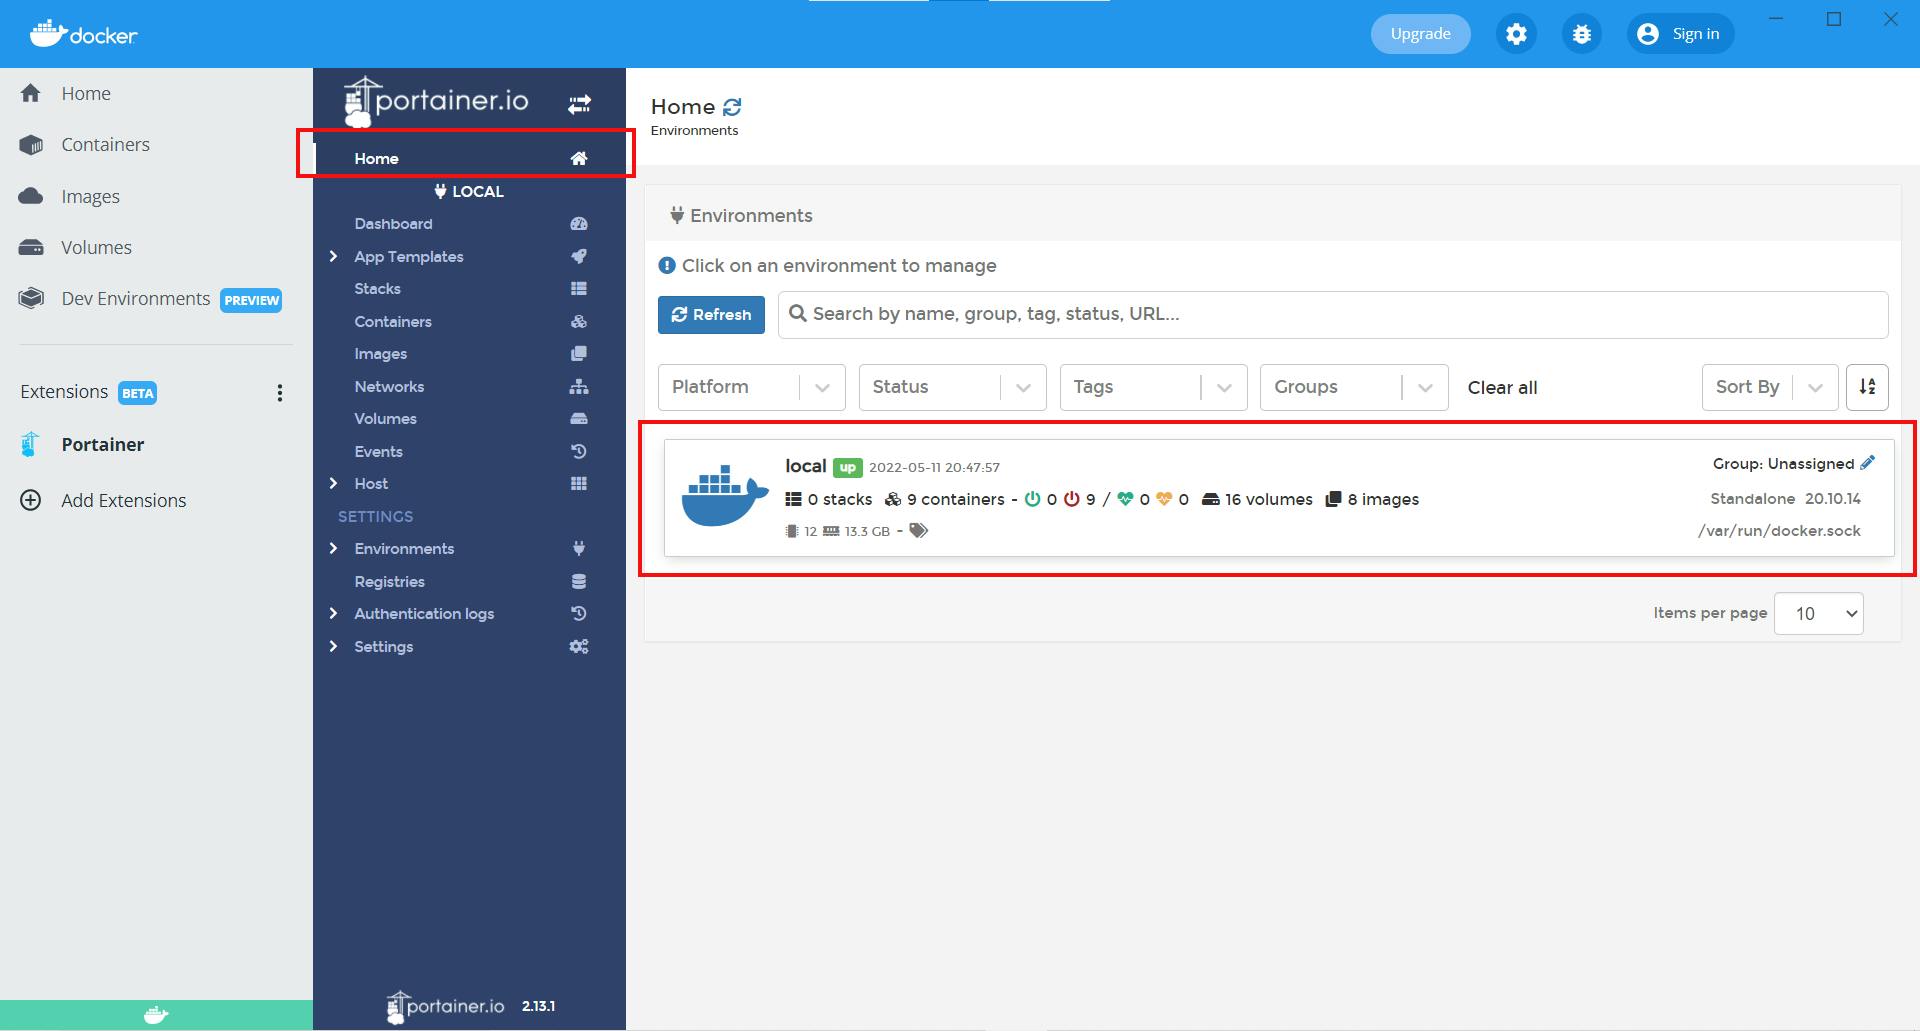
When we click on the desired environment, we can get detailed information about the environment and it properties.
2. Deploy an App Container
In this guide, we will install 'Ghost', a free and open-source blogging platform, as a Docker container using Portainer.
In Portainer GUI, click on 'Containers' and the click on 'Add Container'.

Now type the container name, example - 'ghost-test'. Our default registry is DockerHub from where Portainer will pull our Ghost image.
In the image parameter, write the name of the image to pull. We can also use tag along the image for desired version, example - 'ghost:4' or 'ghost:latest' or 'ghost:alpine'. Here we will use 'ghost:latest' to download latest version of the image.
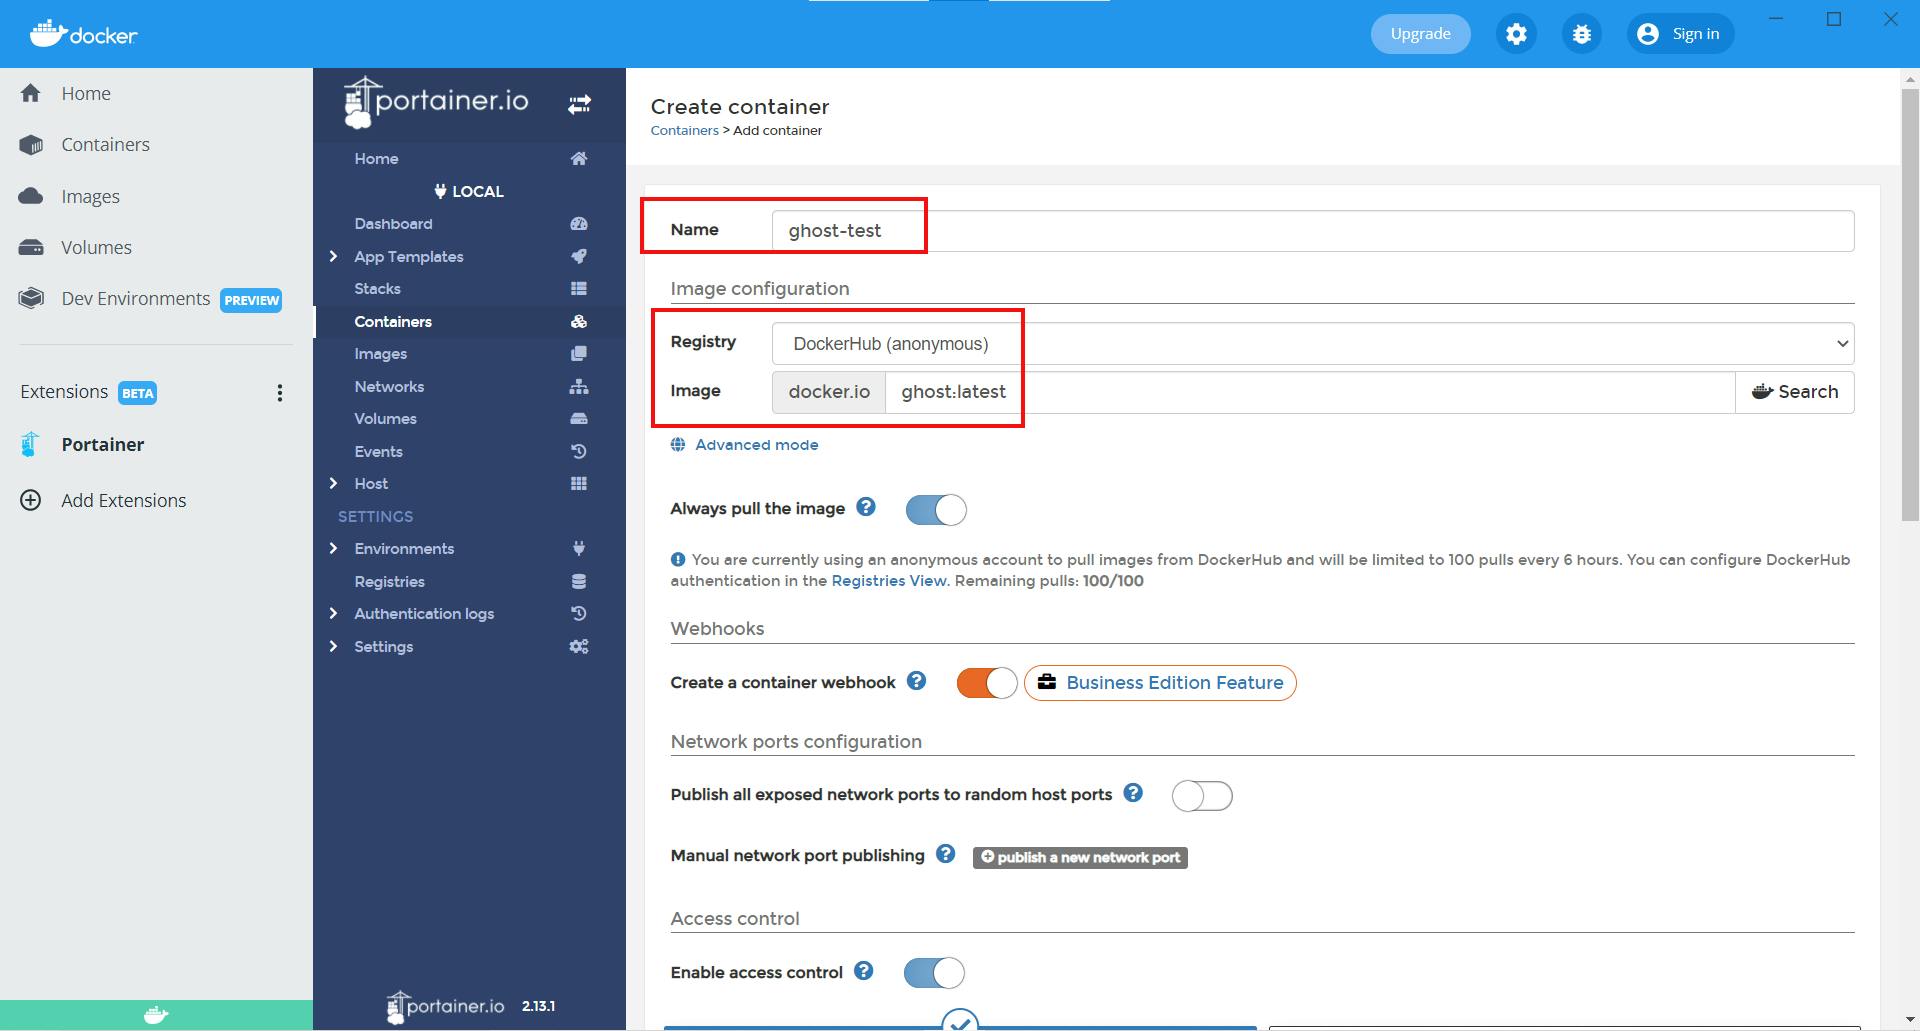
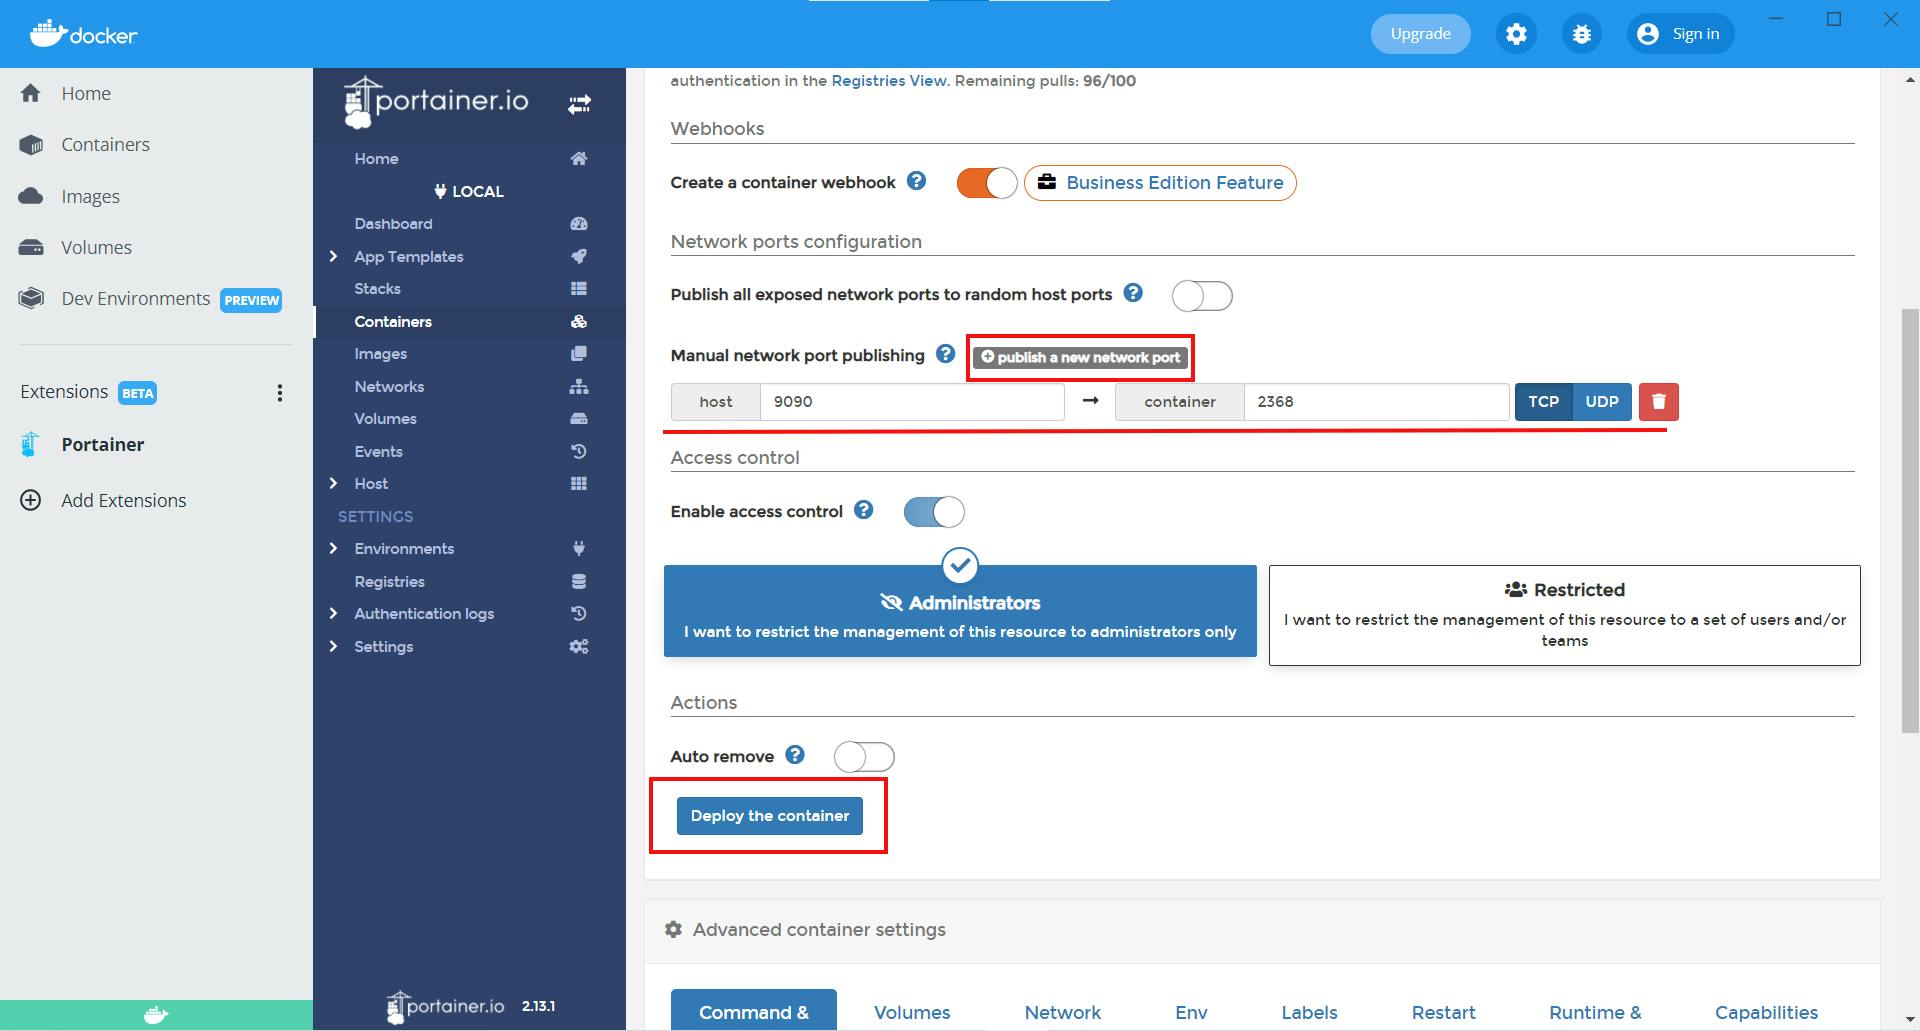
We want is to access Ghost blog from our browser and for that we need to publish a port. We can either choose Portainer to assign random port for us or we can do that manually.
Let us assign the ports manually. Click on 'publish a new port' and we see 'host' and 'container' field.
'host' field is the external port that we will use in our browser to access the service and the 'container' field is the internal port used by our service.
Port for 'host' = 9090
Port for 'container' = 2368 (default port for Ghost)
Leave all other field as it is for now and click on 'Deploy the container'.
Now Portainer will begin the provisioning of the container and after successful completion, you will be taken back to the list of container. Here we can see our 'Ghost' container with status 'running'.
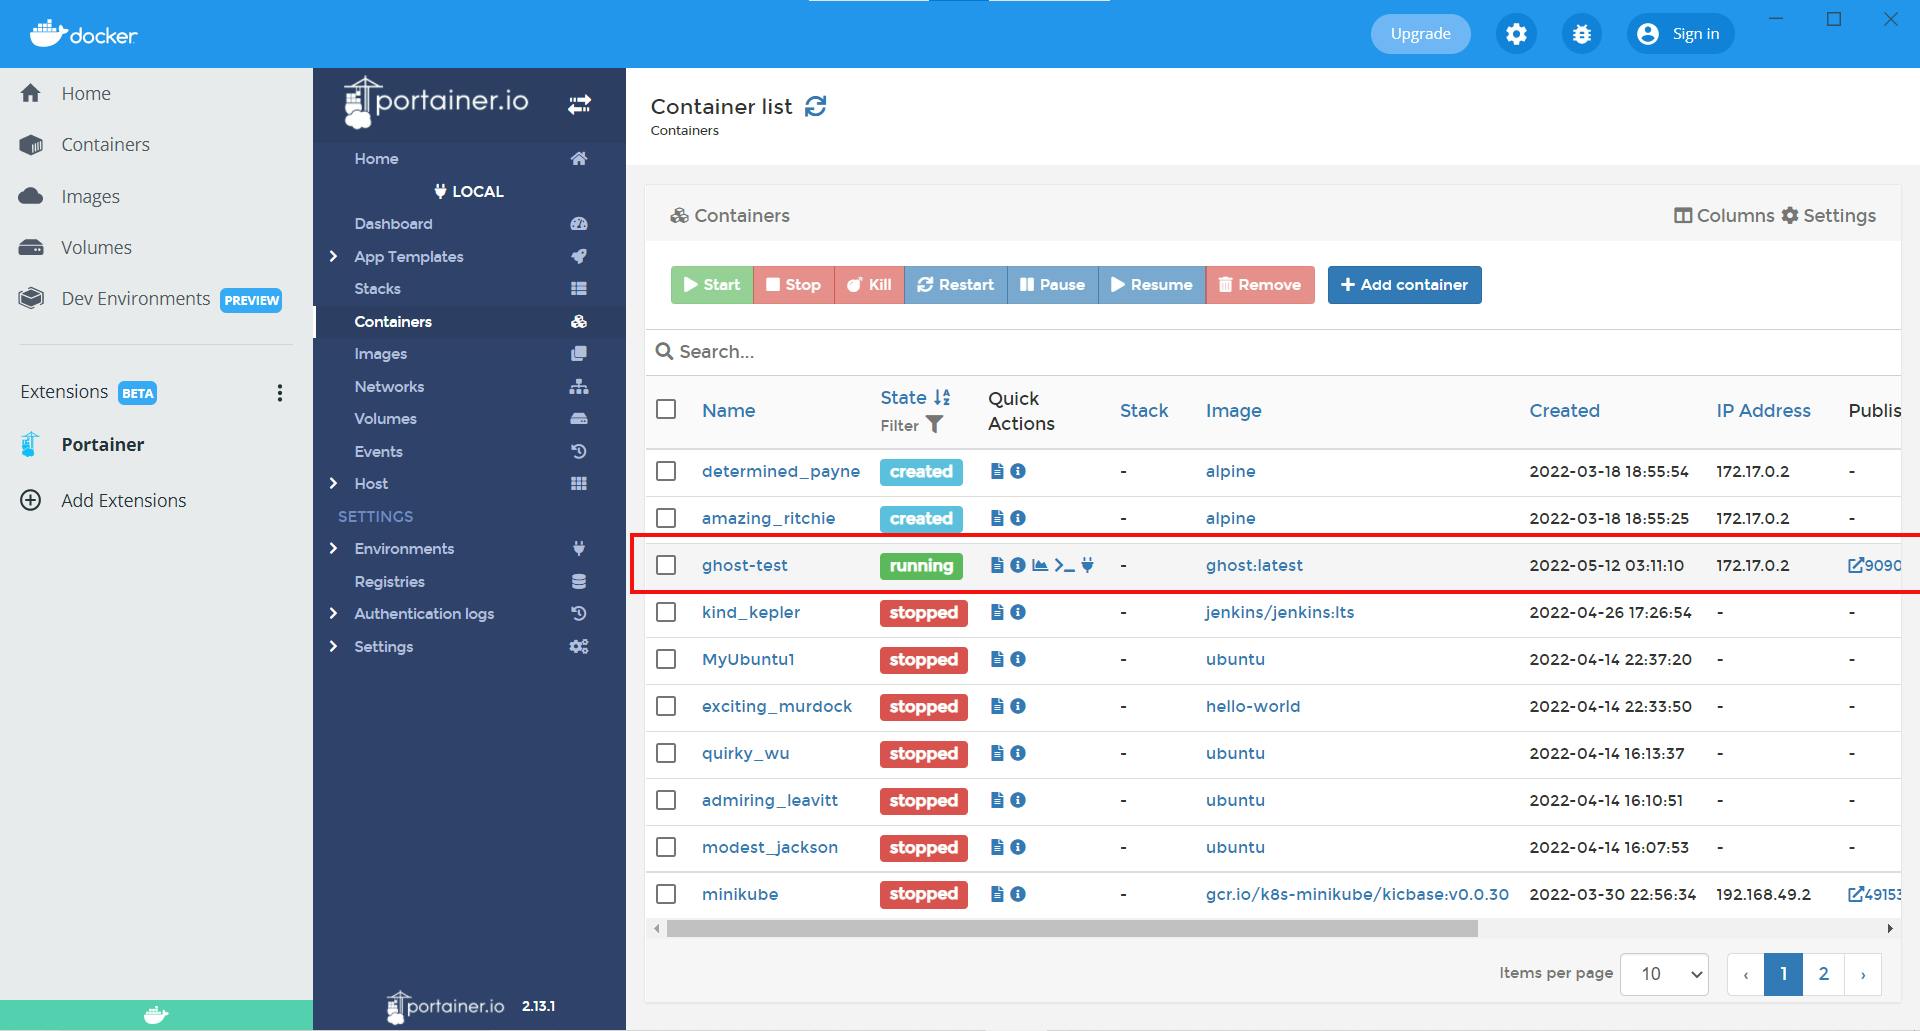
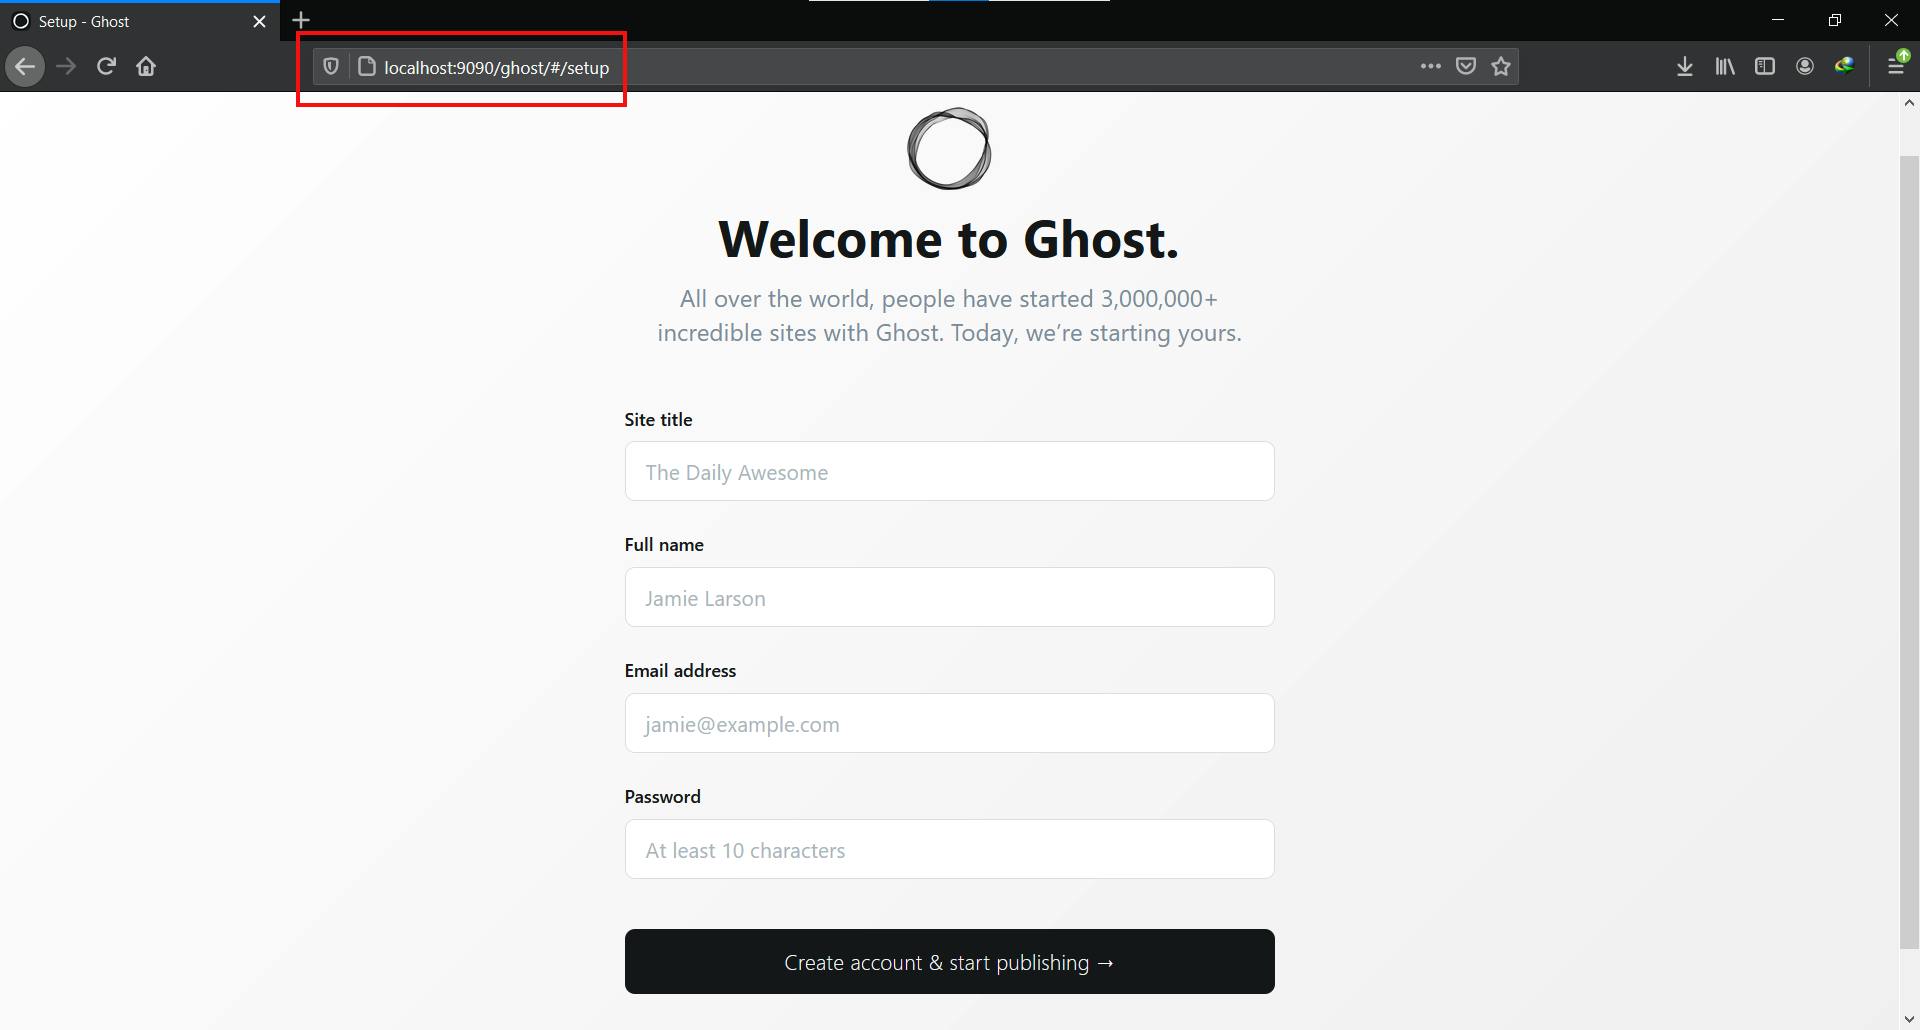
Ghost is now installed as a Docker container and is exposed to port 9090. Now let us go to the browser and see if our Ghost blog service is running. In the address bar, enter the address below:-
localhost:9090/ghost
And we have our Ghost service up and running as shown below.
3. Manage Docker Environment via Portainer GUI
Portainer makes it extremely easy to manage and configure Docker environments like containers, images, networks, volumes, etc. Lets go through them one by one.
Manage Containers
On the Portainer dashboard, click on 'Containers' tab and we can see the interface as below.
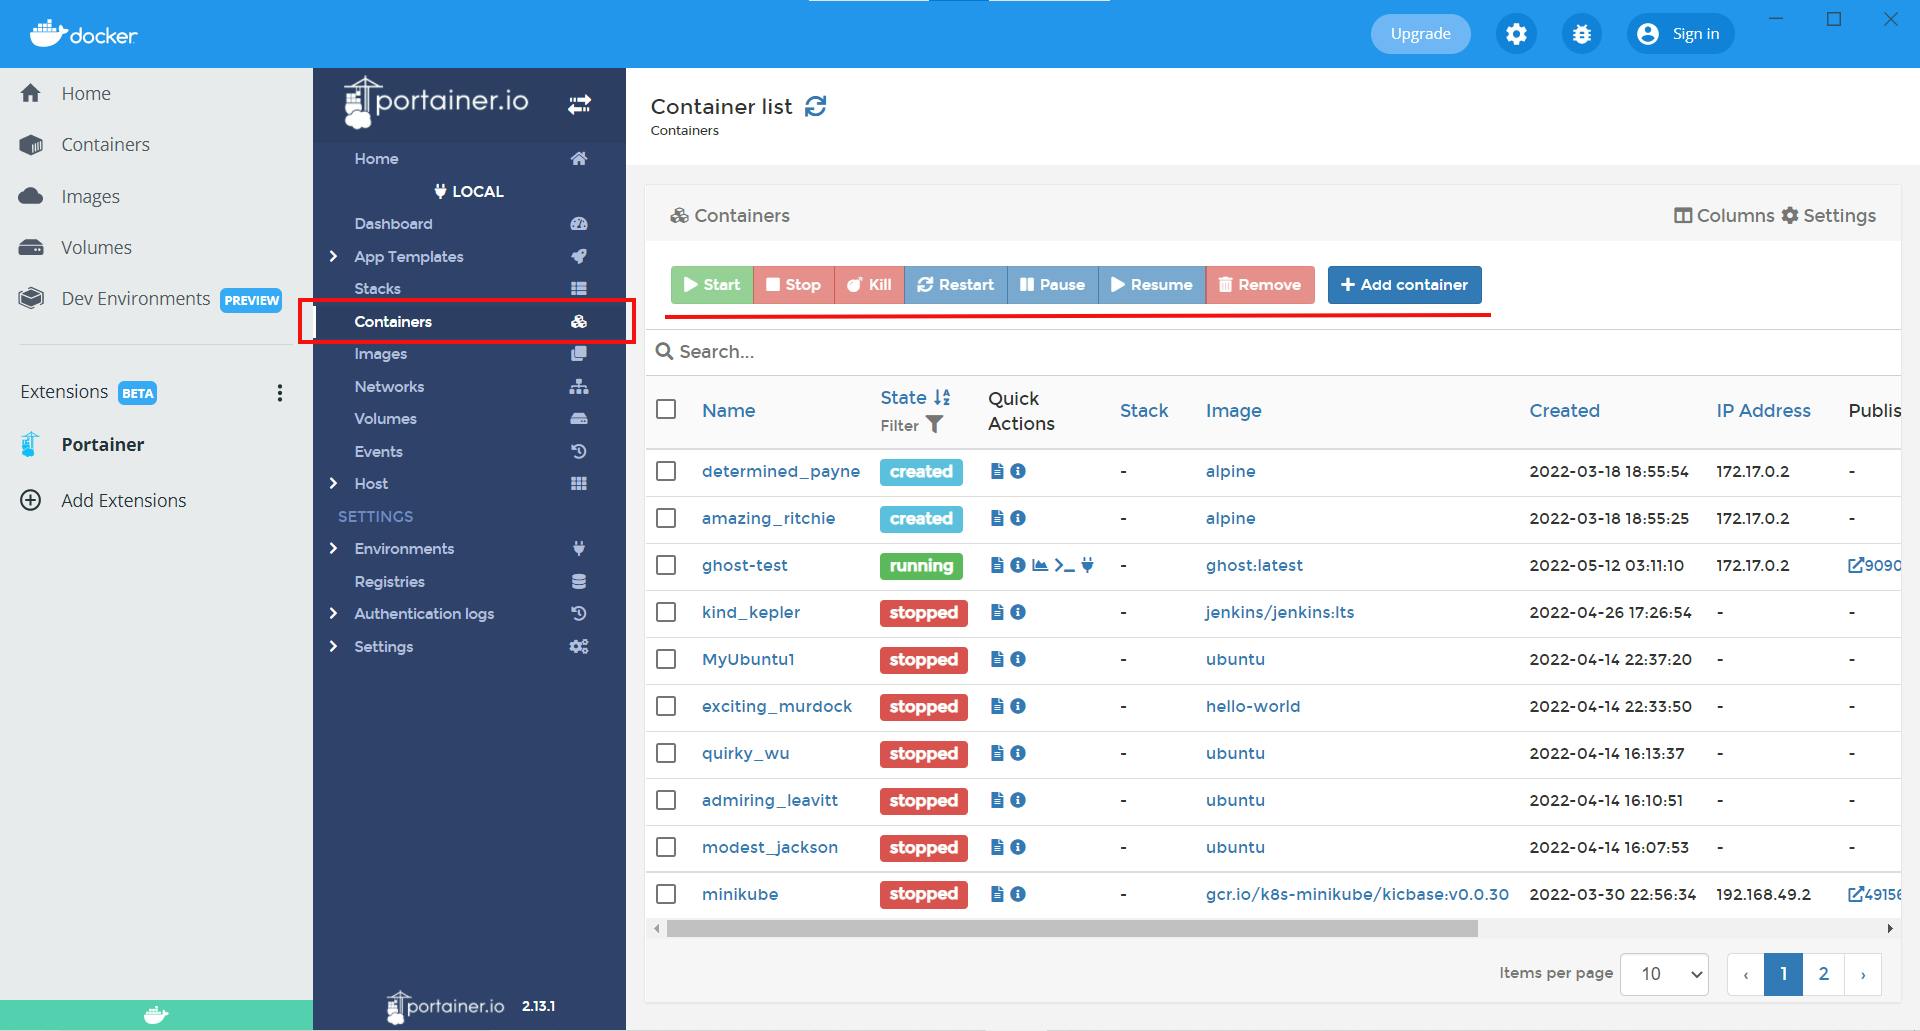
Here we can see the list of all the Docker containers available/installed in our environment. We can start, stop, restart, remove one or more containers and create new ones.
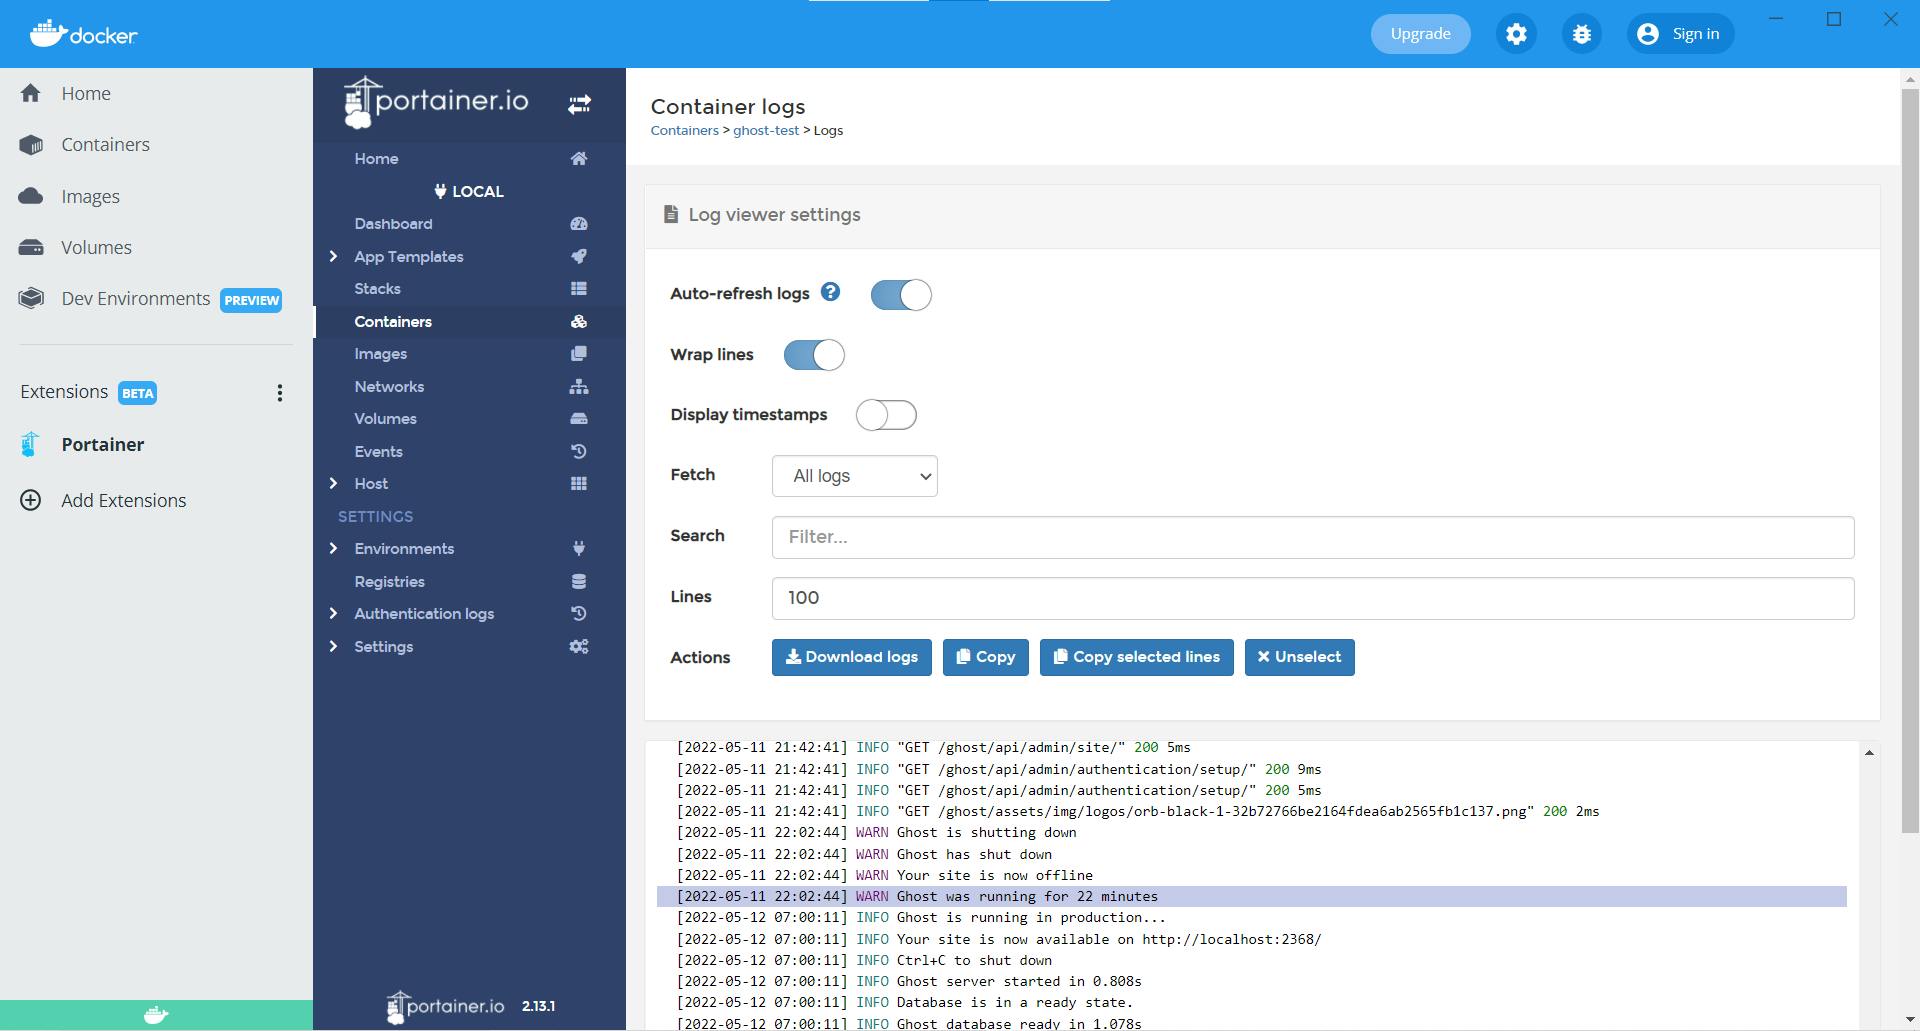
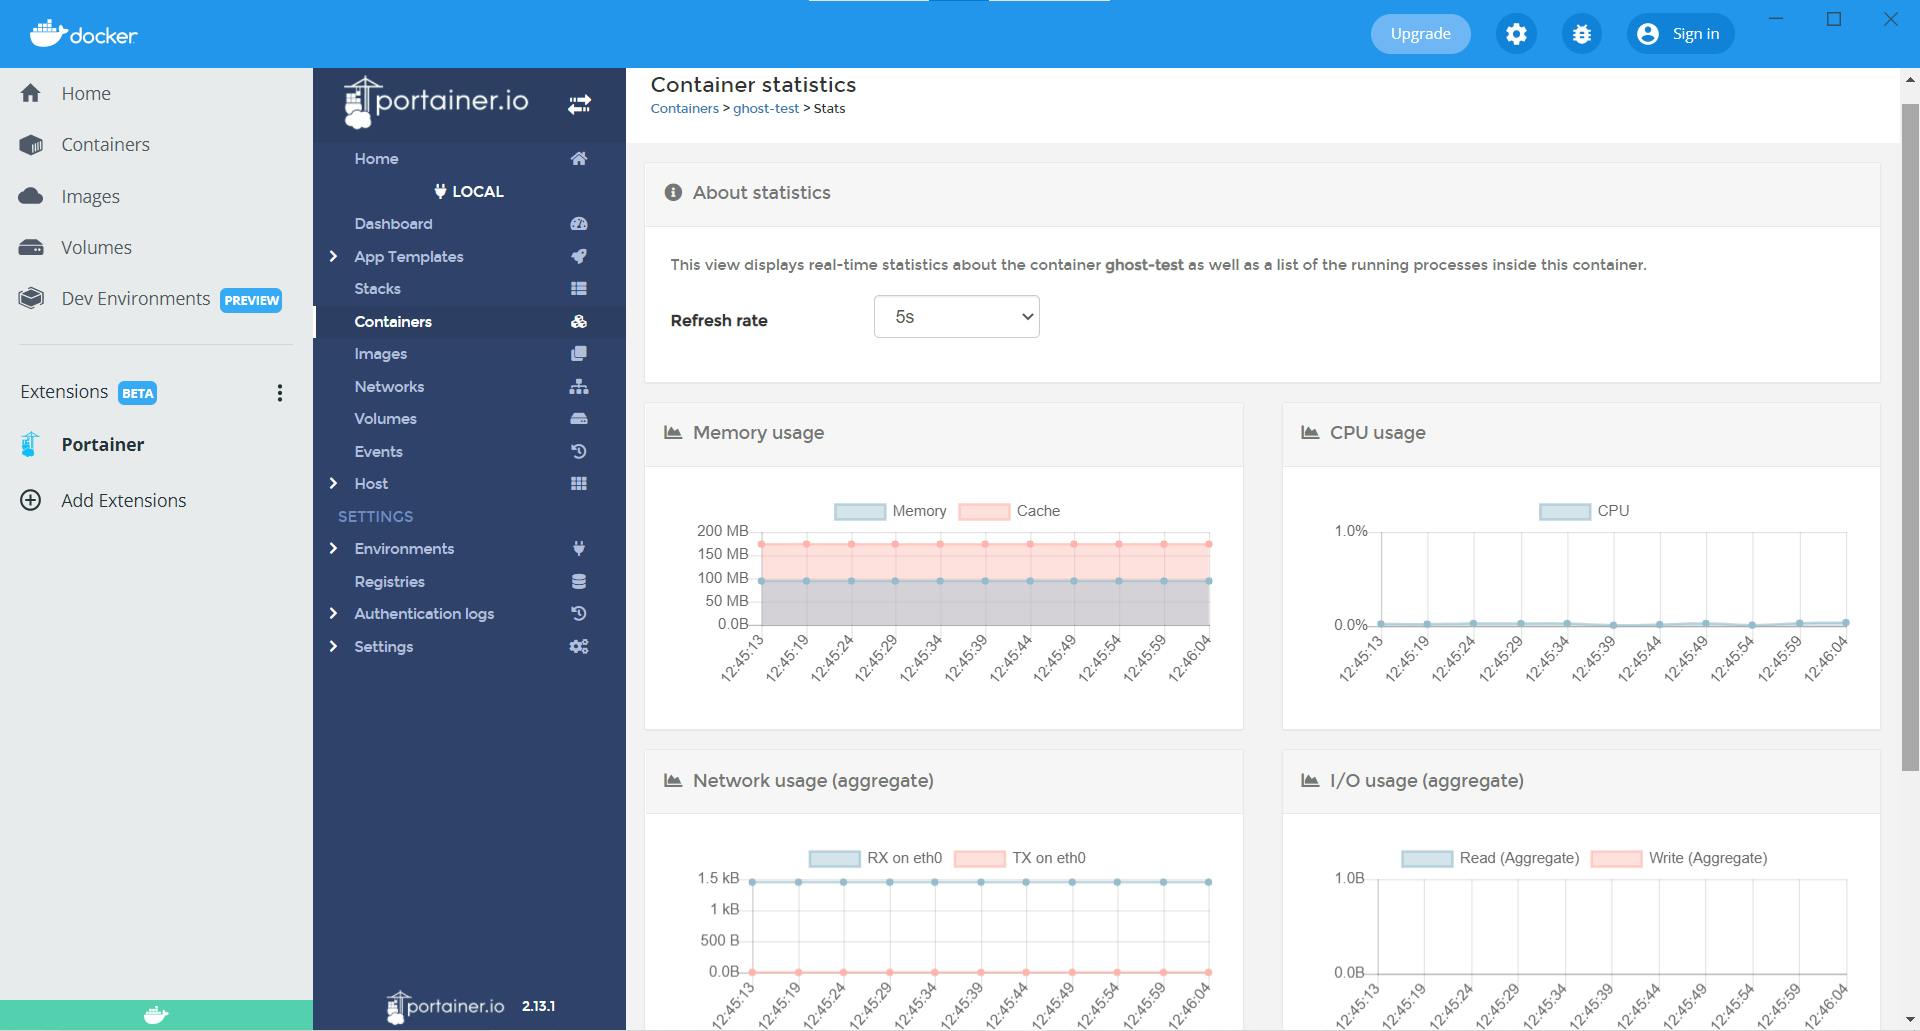
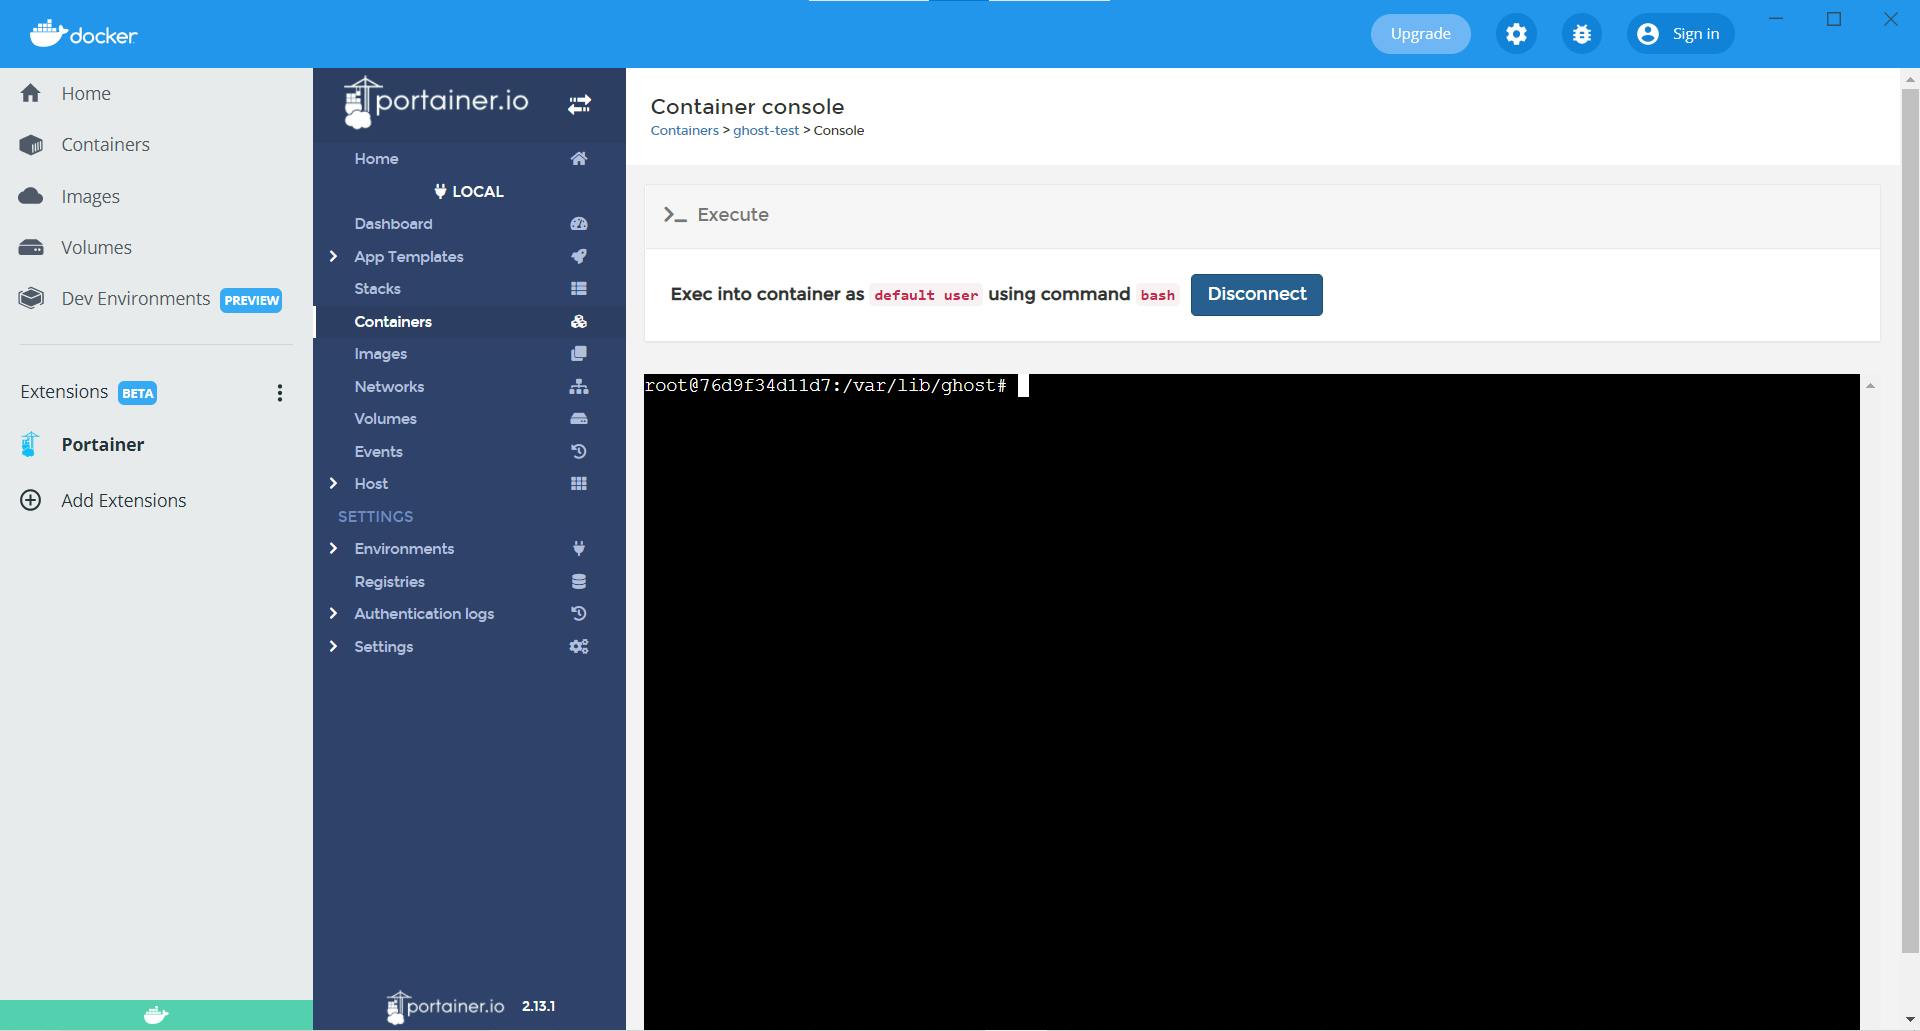
From 'Quick Actions' tab, we can access and download container logs, see the container statistics and access the shell of the container.
Ghost Container logs:
Ghost Container Statistics:
Ghost Container Console:
Manage Images
Click on 'Images' tab and we get the interface as below.
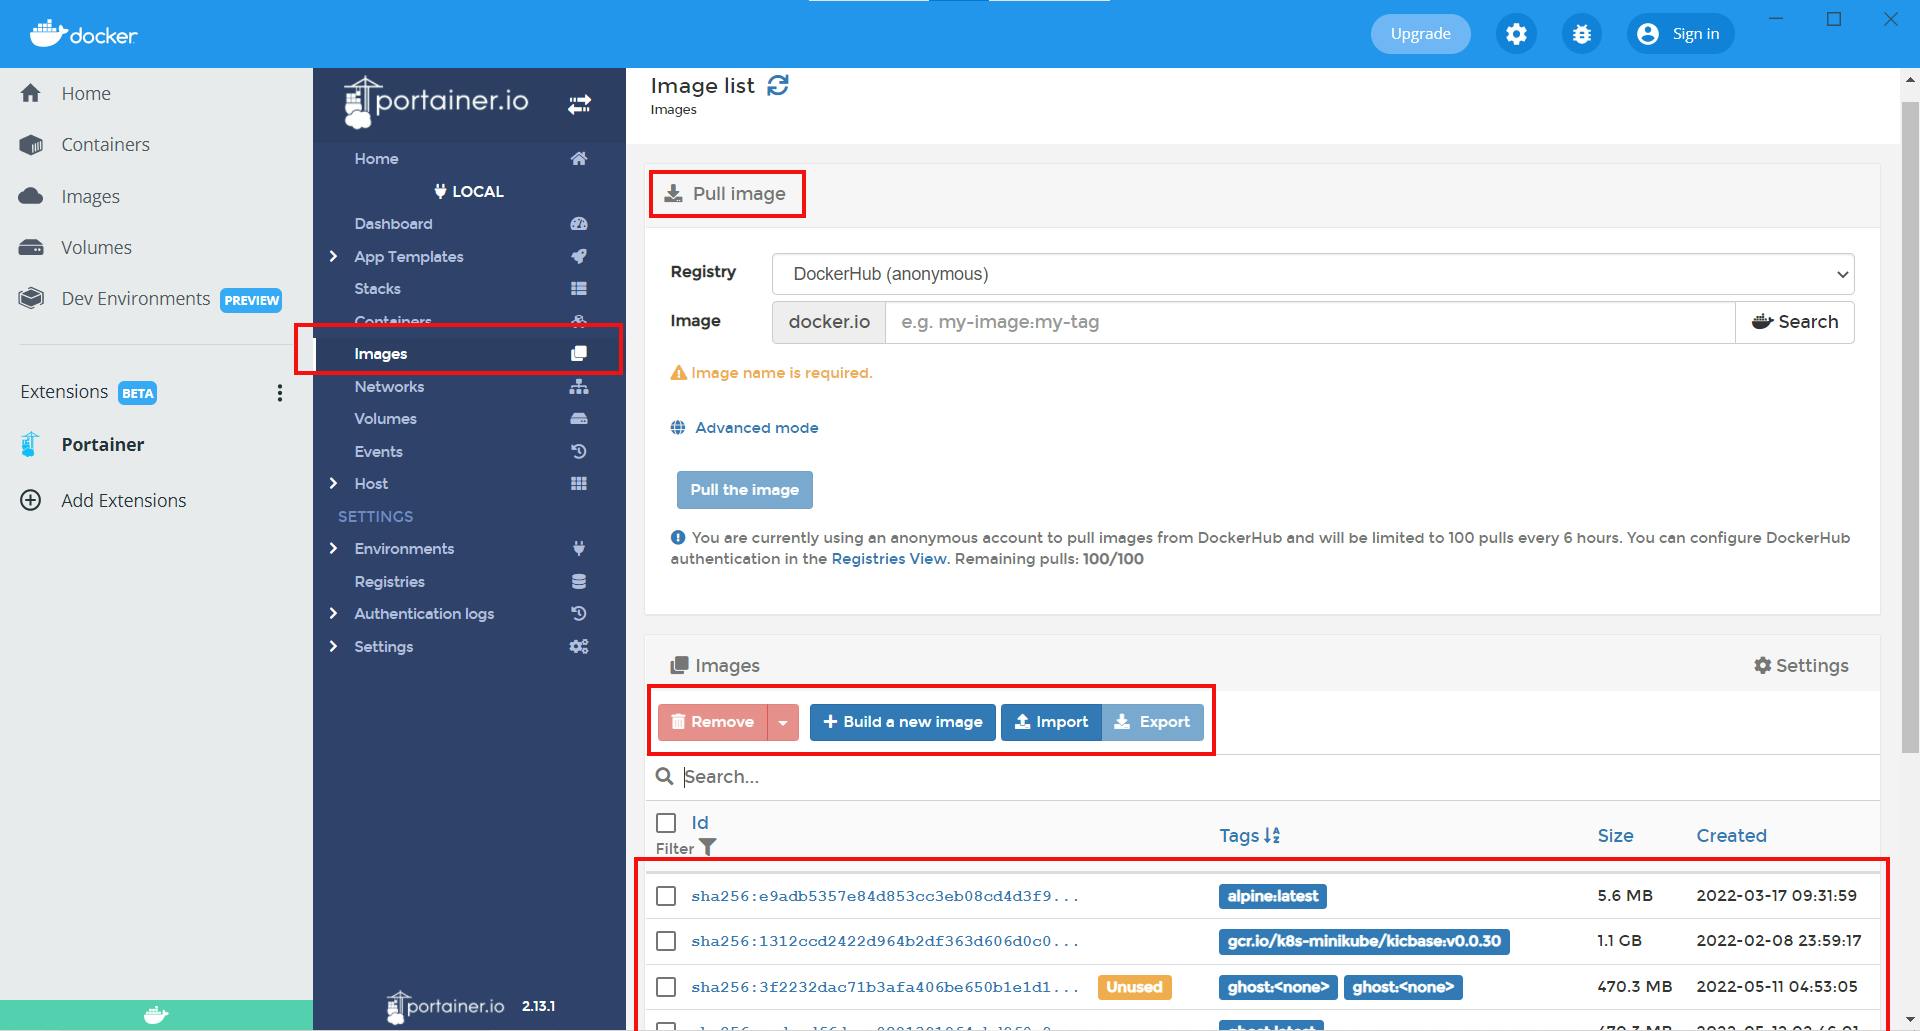
Here we can see the list of all the images available on the system. We can also download new container images by pulling them from DockerHub repository or create a new container image manually.
Manage Networks
Portainer lets us create a new custom network or remove a network from our environment. We can also see properties of created networks. Click on 'Networks' tab to get the interface as below.
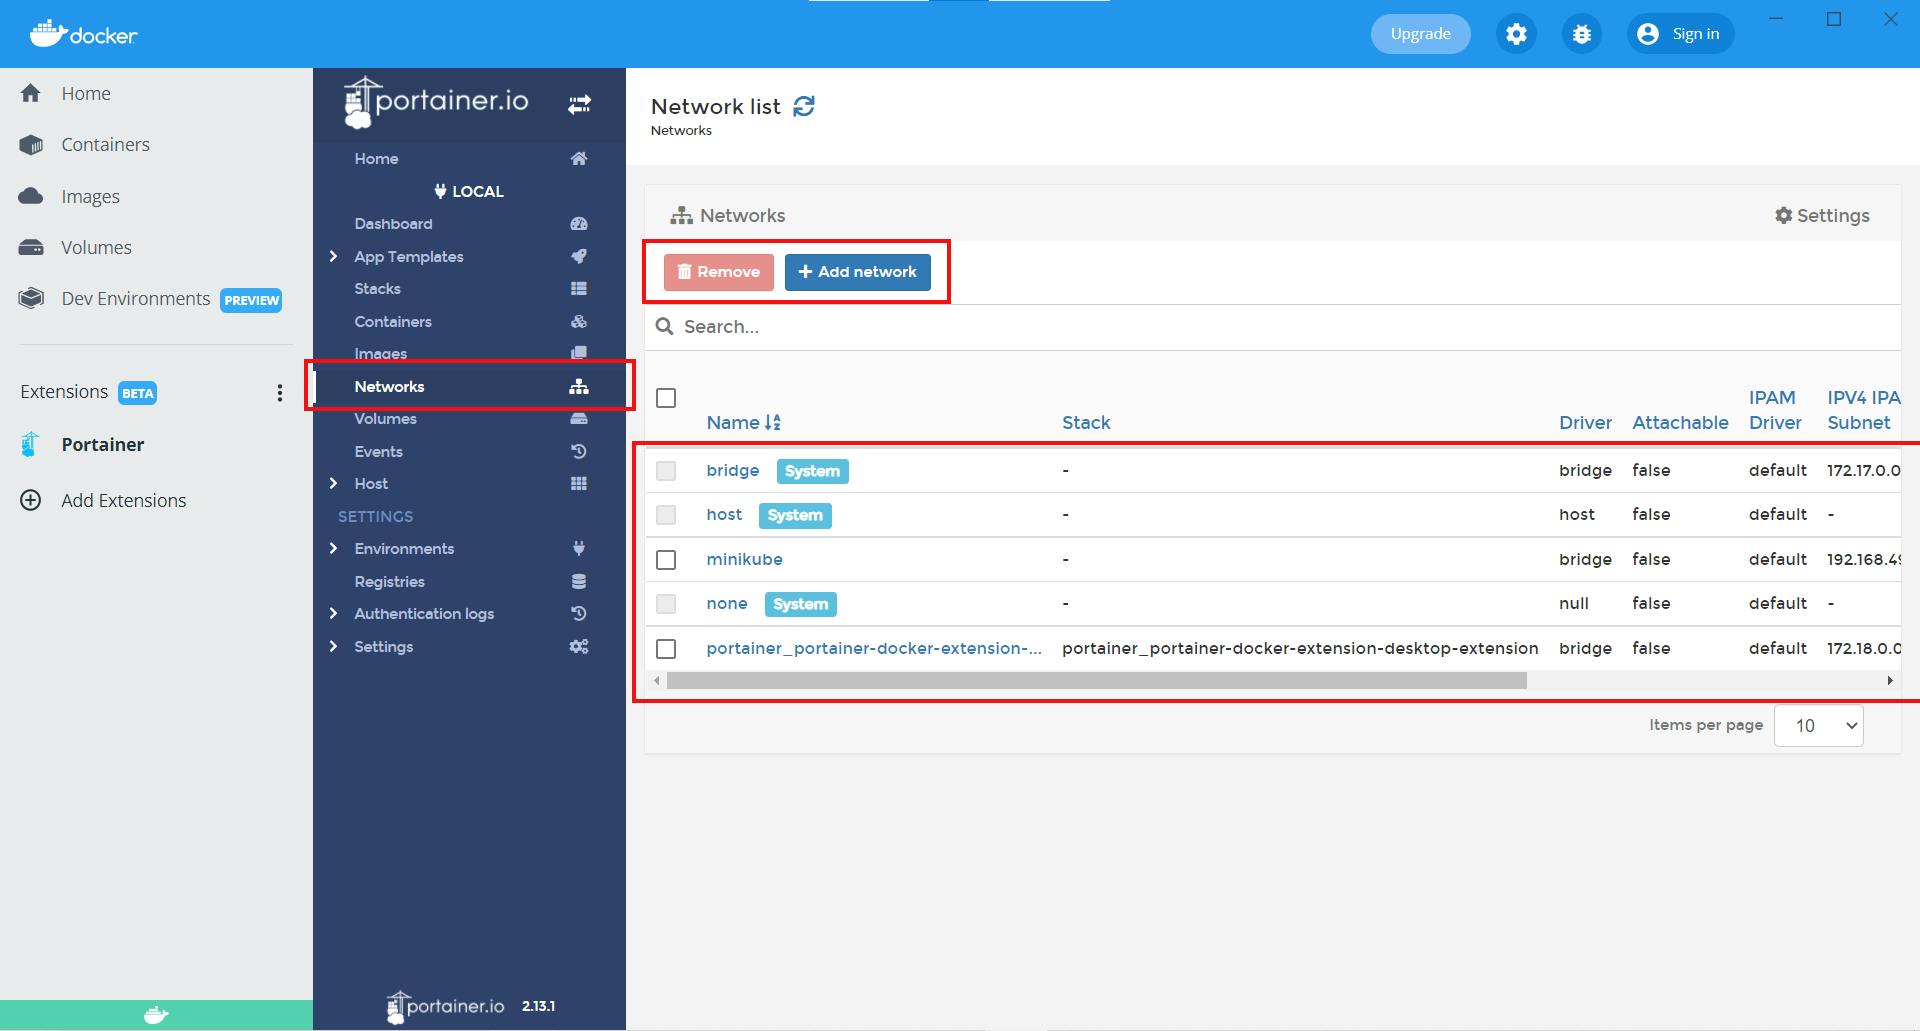
As of now, network type supported by Portainer are bridge, macvlan, ipvlan and overlay.
Manage Volumes
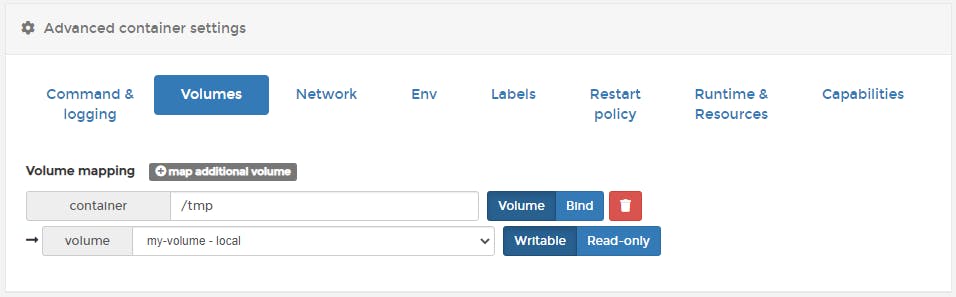
The 'Volumes' tab enlist all the volumes in our environment. In Portainer we can easily create new volumes for our container and remove existing ones.
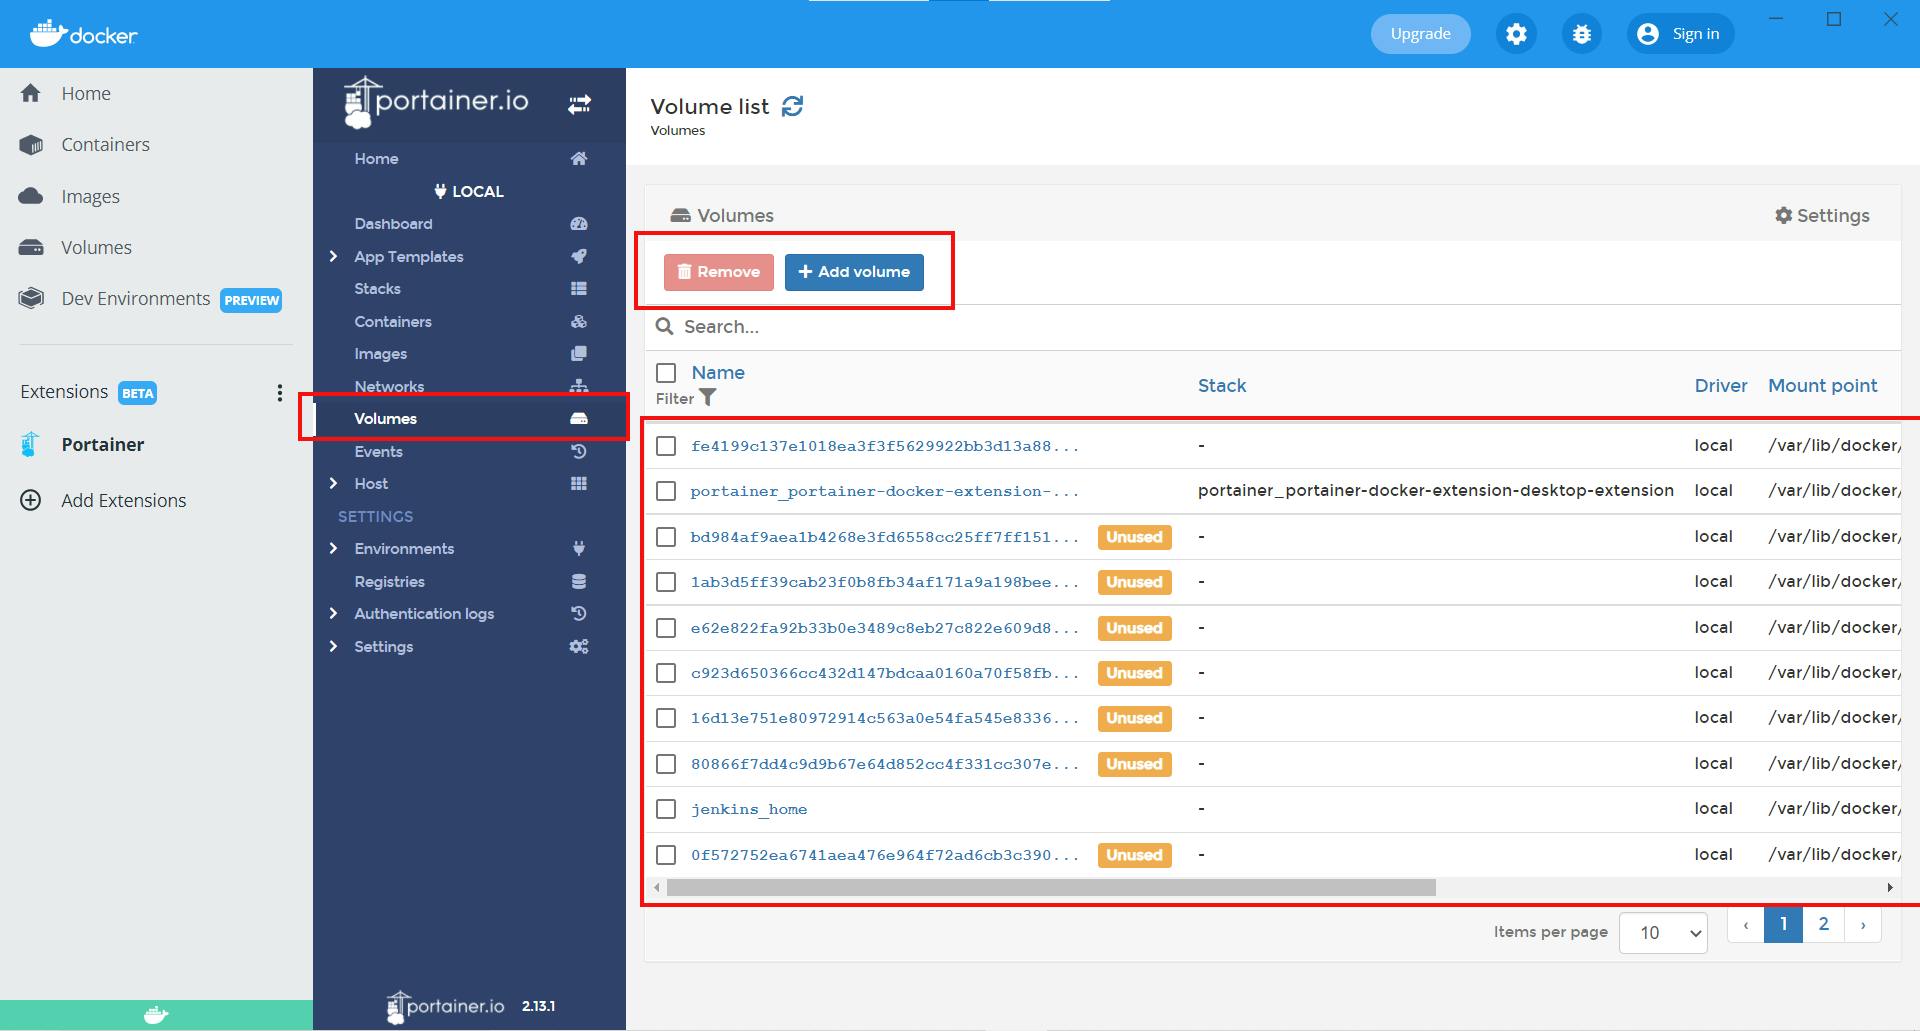
After creating a new volume, we can attach that volume to the app container by going through 'Advanced container settings'
A point to note
In our tutorial, from installing Portainer Extention on Docker Desktop to successfully running our app container service, we did not had the need to write a single line of code. Portainer has not only made the whole process super easy but also time efficient.
Conclusion
Portainer is an amazing and feature-rich tool that can be used to maintain Docker containers, Docker Swarm services and other resources from an easy-to-use and intuitive interface. Apart from Portainer Community Edition (CE), which is a free and open source; we also have Portainer Business Edition (BE) with power features such as registry management, role-based access control and dedicated support. For more information, do visit Portainer.io.
Thanks for reading..!!